Hiking for Art

The main attraction for the Utah portion of our trip was Horseshoe Canyon to check off a “bucket list” item for my husband – seeing the art galleries on the canyon walls.  You’re probably asking yourself, “Art in a canyon?  What?”  Yes, art in a canyon.  But first, we had to get there – and that posed potentially the greatest challenge of all.

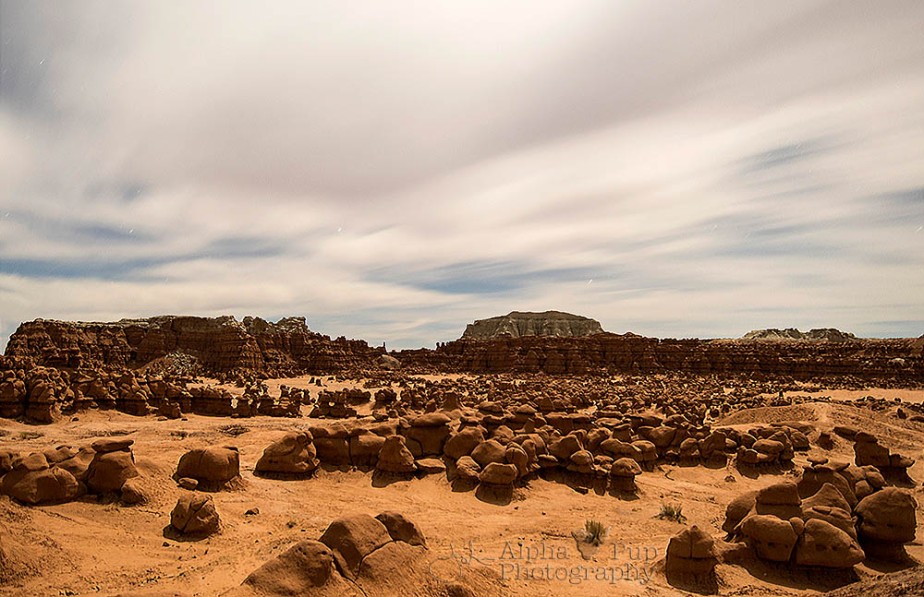
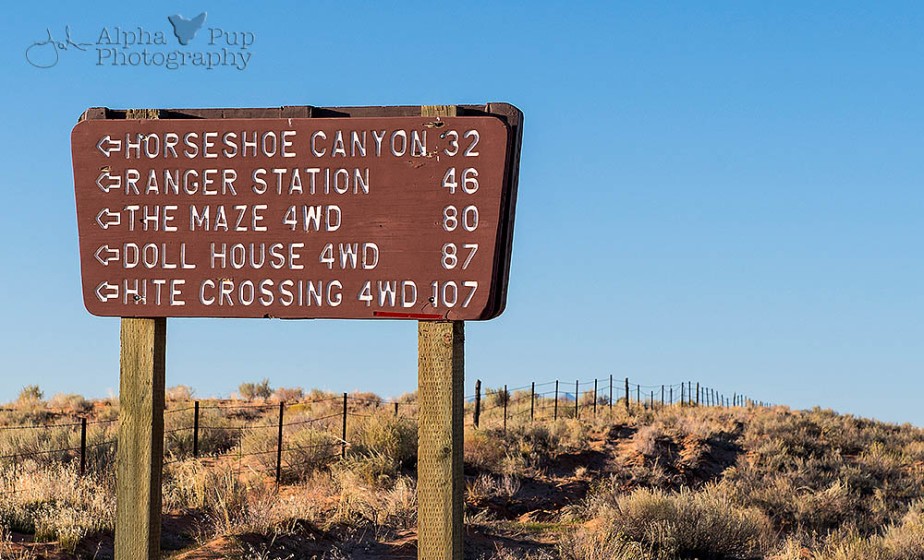
Horseshoe Canyon is located in eastern Utah and is a satellite part of Canyonlands National Park.  That doesn’t mean it’s close to anything – it’s just in the middle of nowhere.  (Sensing a pattern here with our trips yet?)  To reach the trailhead, you have to traverse 32 miles of dirt road that’s only sometimes passable by a 2-wheel drive vehicle with enough ground clearance.  4-wheel drive is recommended, but even then it can be a crapshoot with the road conditions if winds suddenly pick up and bury the road in fine red sand.  So, it’s a tricky trek to the trailhead that also requires a touch of luck to make it all the way.

Away We Go

We had more than a little luck on our side the day we attempted our hike.  The vicious winds from the day before had died down and didn’t blow too much loose sand on the road.  Considering the conditions this road sometimes sees, it was in really good shape.  That didn’t make it any less nerve-wracking for my husband doing the driving though.  Thankfully we didn’t encounter any iffy areas along those 32 miles on the way in – win!  (Getting back to camp we’d deal with later in the day, then breathe easy once we were done.)

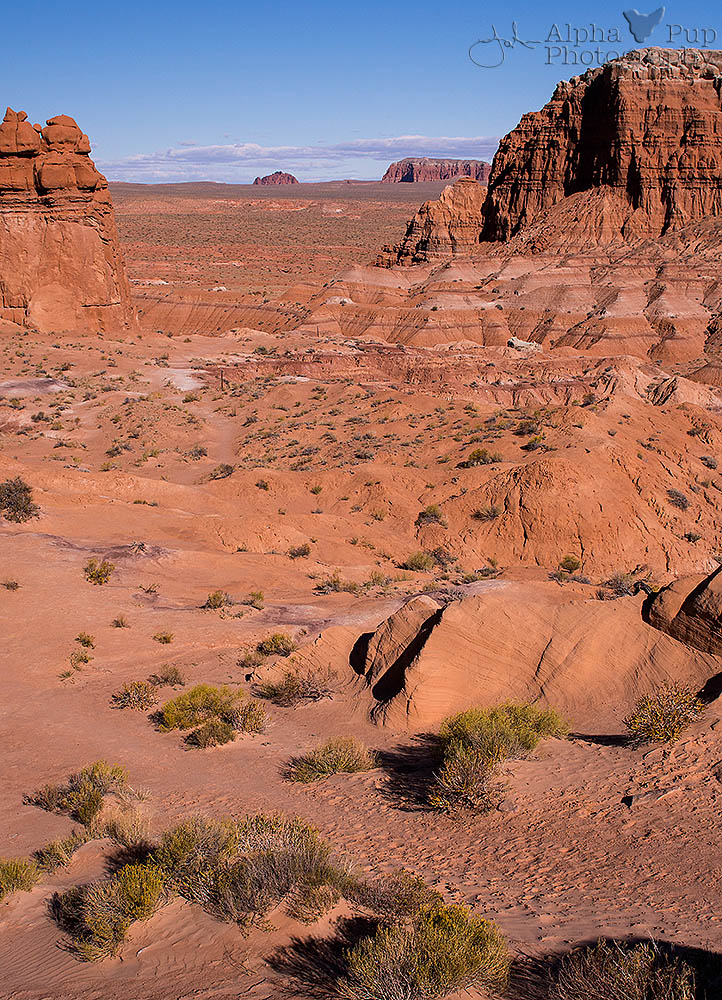
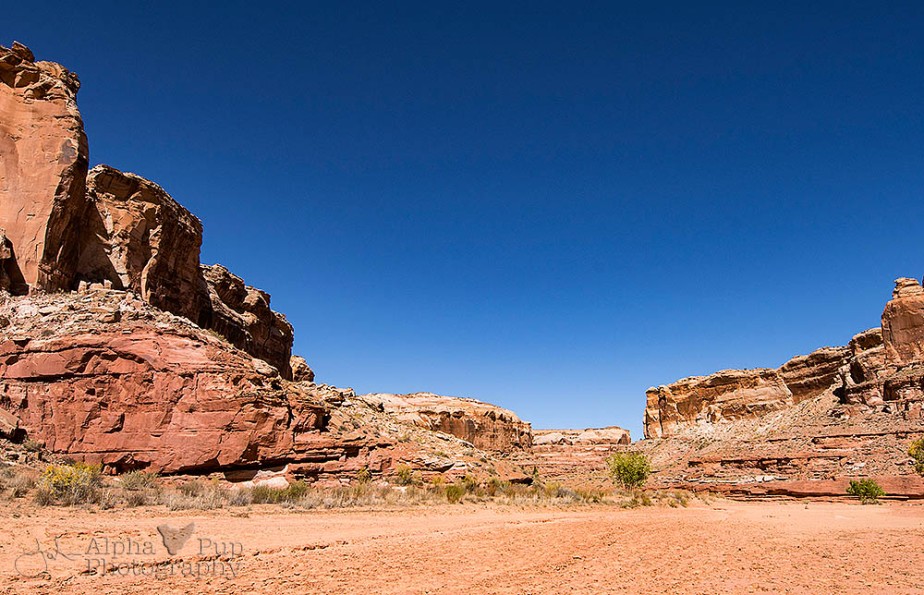
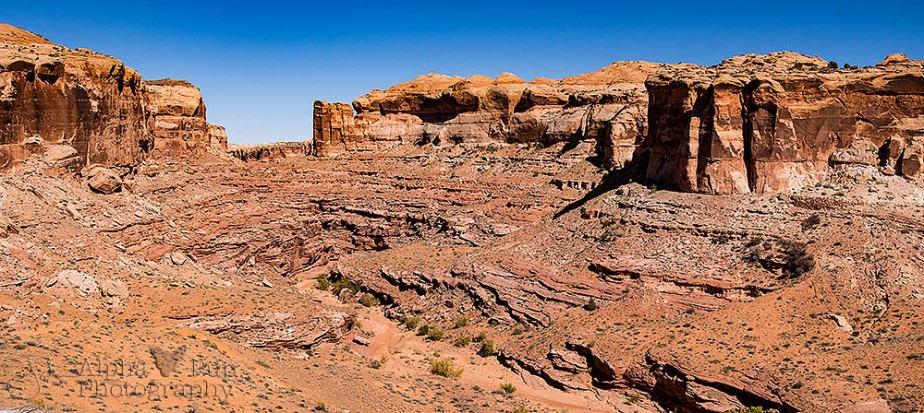
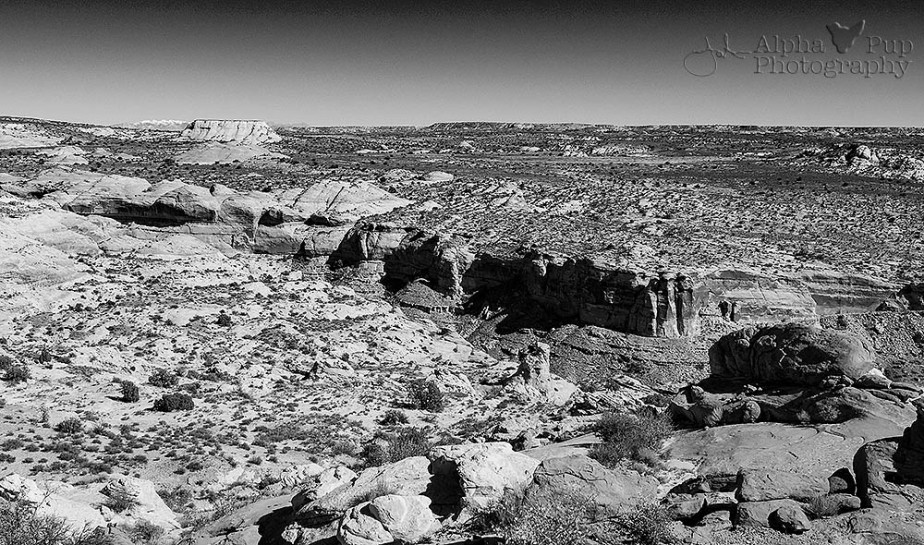
As soon as we reached the trailhead, the canyon was a sight to behold.

Horseshoe Canyon Panorama

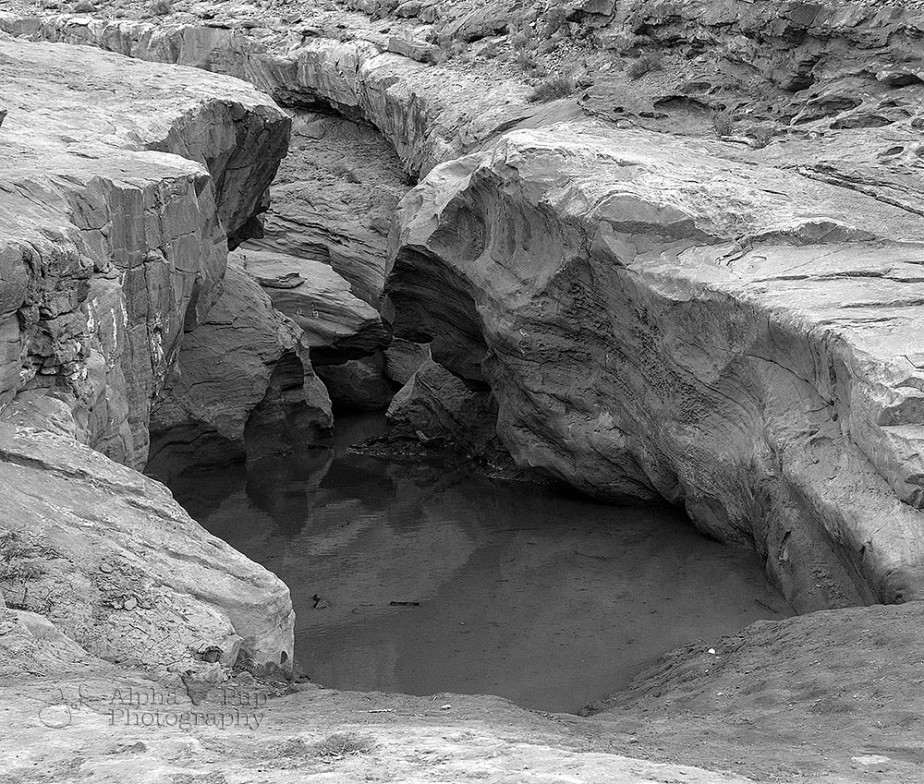
The hike starts with a quick trip down to the canyon floor about 750 feet below.  That first mile was full of treats too.  We saw some fabulously interesting rock formations, some sort of old watering or irrigation trough, and a dinosaur print!  Not too shabby for the first mile.

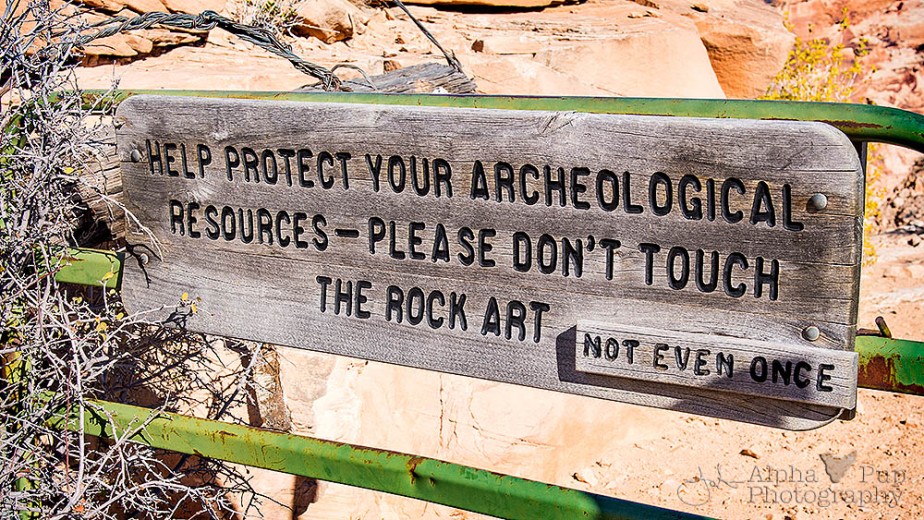
A little further into our descent, we came across a horse gate that is used to limit access via horseback into the canyon.  (Access via horseback is by permit only.) . I thought the sign was absolutely fabulous – even if the letters may have been a little too small to drive the point home to some visitors, in my opinion.

Serious Reminder

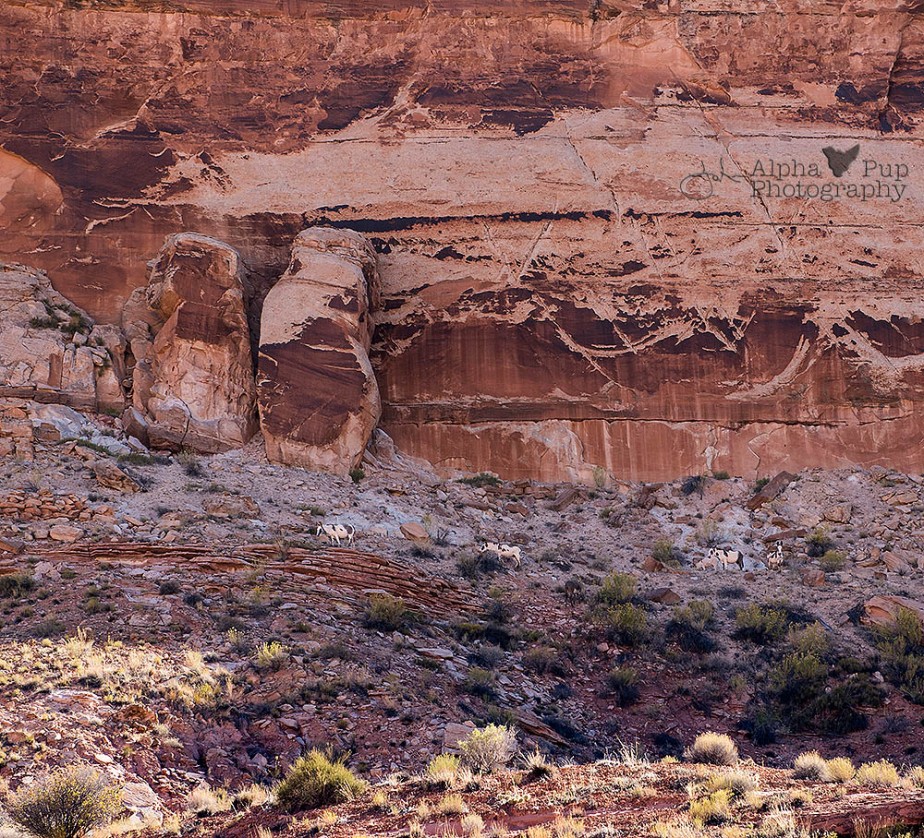
Just past the gate, we were greeted by some of the native burros that live in the canyon.  These burros were left in the canyon by the Spanish ages ago and have thrived in the environment since then.  They were on the opposite side of the canyon from us, so not close enough to be bothered by our presence (or for me to get a really good picture of them – look for the white & brown creatures near the middle of the picture below).

Burros

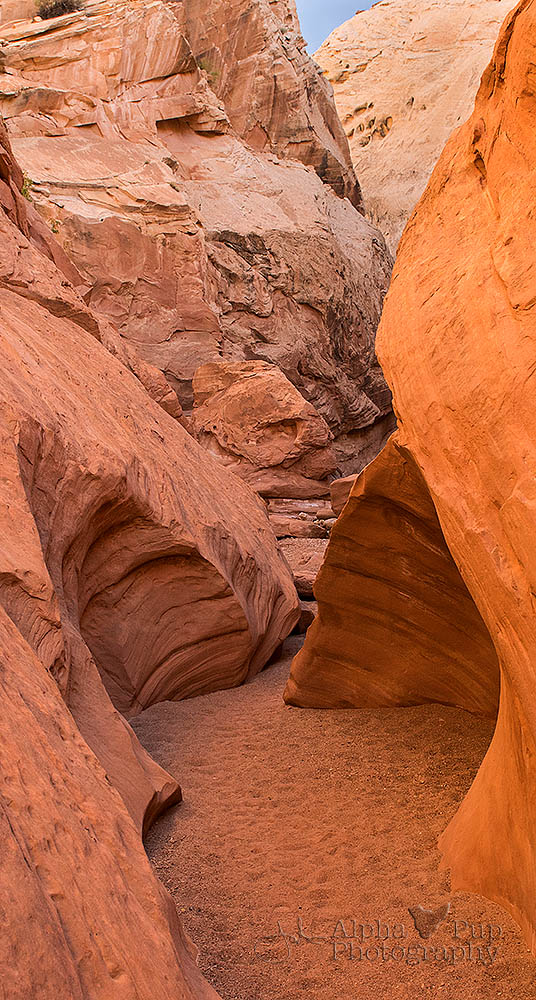
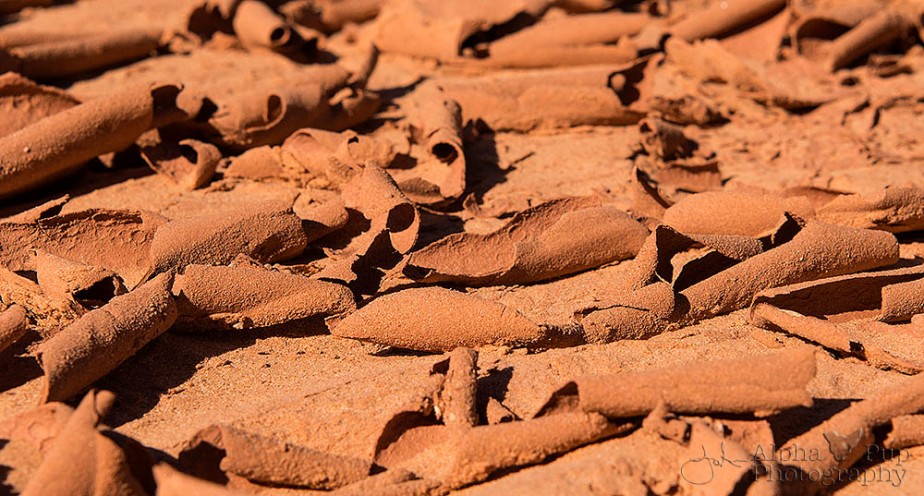
The canyon floor itself became a real treat for my photography eye as we trekked… much to my husband’s chagrin because he came to see the art in the canyon, not be slowed down by me making art.  The mud had cracked and curled all over the canyon floor.  To me, it looked like a vast expanse of chocolate curls.  (Yes, my brain always goes back to food someway, somehow.)

Clay Cigars

The near-frenetic pace of sights and things I wanted to take pictures of pleasantly surprised us a little.  And we hadn’t even reached the first art gallery!  Finally, I did put the camera away long enough so we could pick up the pace and we arrived to see what we came for – ancient pictographs & petroglyphs!

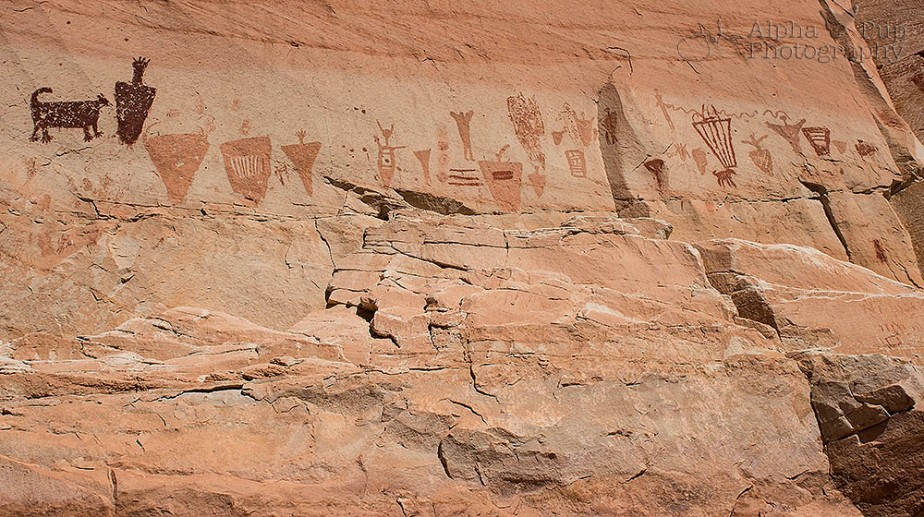
There’s 4 galleries in the canyon with panels that are considered to be the finest examples of Native American rock art in North America.  The first gallery we arrived at was the High Gallery.  When you see how high up it is, you realize how that panel got its name and then you start to wonder, “How in the world did they get up there to make those images?!”

Not too far after the High Gallery, you reach the Horseshoe Gallery.  This one was also fairly high up on the canyon wall, but not as much as the previous display.  It was also in the sun on light-colored rock, making for a completely different photography challenge for me.

Horseshoe Gallery

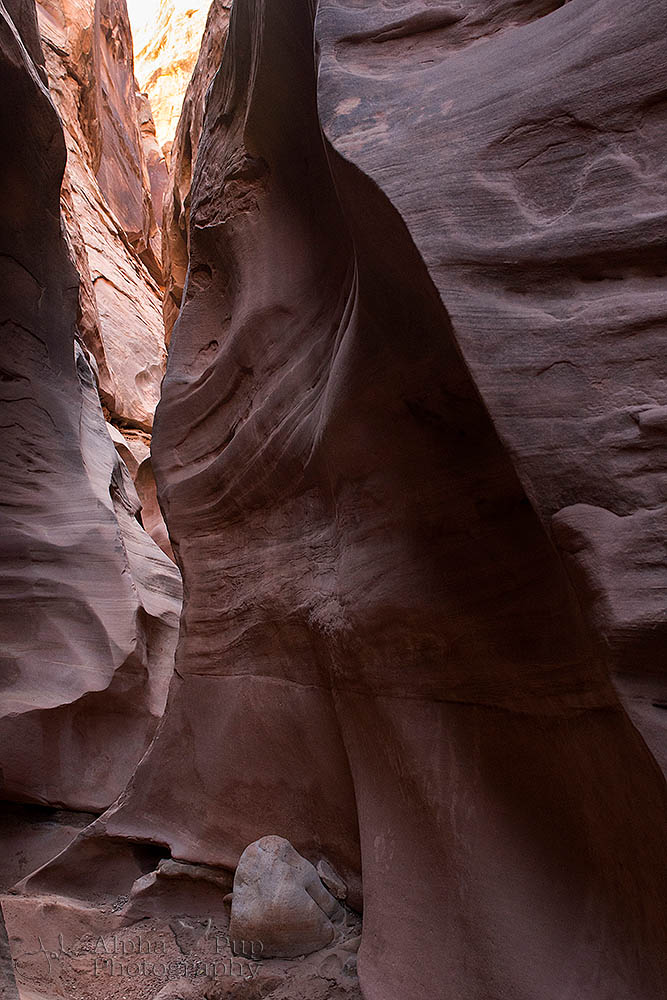
After that one-two punch of the High and Horseshoe Galleries, we meandered through the canyon bottom following the dry stream bed and trail.  Thankfully it wasn’t too terribly hot that day since it was autumn, after all.  I couldn’t imagine doing that hike in the middle of summer where temperatures would be well over 100.  Ugh – too dang hot!

About halfway down to the next gallery, we heard a loud squawking noise in the canyon.  We couldn’t believe how loud it was and started looking up for birds.  We didn’t see anything in the sky or tucked into the rock walls, so we had a little mystery on our hands.  Something to ask the ranger about if we ran into one back at the trailhead at the end of the day.

Eventually, we saw a huge alcove that almost looked like the shell of an outdoor amphitheater.  That’s precisely when we realized we were nearing the 3rd gallery – the Alcove Gallery.

The Alcove

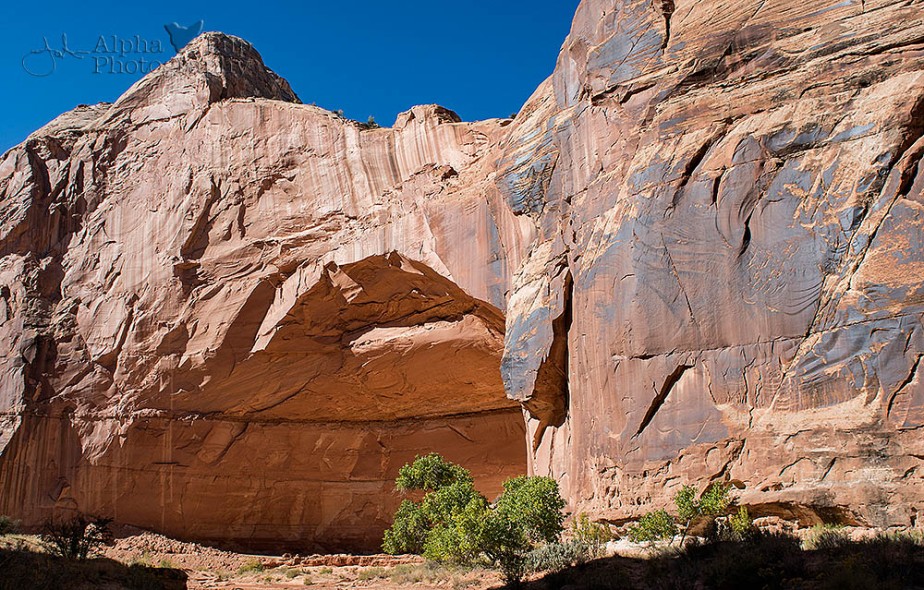
Where the first 2 galleries were high off the ground, the rock art in the Alcove Gallery was smack at ground level (behind a thin chain fence to deter visitors from touching it, naturally).  Being able to get up close to the art was really cool.  I was able to get some lovely detail shots of the images.  We even noticed places where cowboys coming through the canyon in the 1920s had etched their names in the rock – with pretty decent penmanship no less!

The grand finale was still about a mile ahead of us.  So… trudge, trudge, trudge… walk, walk, walk.  That brought us to the Great Gallery.  It’s the oldest and most elaborate panel in the entire canyon.  This panel is what my husband came to see, and boy did he ever enjoy it!  (Click on the pictures to enlarge them & check out the detail of the rock art.)

After a spot of lunch, it was time to head back to the trailhead.  Since the sun was more or less straight above the canyon, that lit up some of the features that were in deep shadow when we set out on our hike that morning.  Yay for me!

Heading Out & UpAlmost Up & Out

Not long after I snagged that 2nd shot above, we heard that squawking again.  Only this time it was really, really loud.  We had just seen some of the burros on the other side of the canyon and that’s when it clicked – the squawking we heard in the morning at least a 1/2 mile from where we first saw the burros was the burros!  Holy hell they’re loud in that canyon!!

Once we got back to the rim and the trailhead, it was time to pack-up and go after a fabulous outing.  Before we left, I did snag a quick shot across the canyon up to the northeast since the La Sal Mountains were shining out on the horizon with a fresh coat of snow on their peaks from the storm that passed through the day before.

La Sals Far Away

With the gear stowed, we were off to conquer the 32 miles of dirt road once more.  Some sand blew across the road while we were hiking, but thankfully it remained passable.  Back at camp we cracked open some beer and celebrated a really good day of hiking and an item successfully checked off of my husband’s “bucket list”.

– JC

Moonlight as Daylight

Whenever we’re out in the middle of nowhere land, there’s one thing we always look for at night – stars!  Being in remote places like that, there’s little – if any – light pollution from cities or towns and the night skies are magnificent.  On a clear night you can see the Milky Way as a bright band across the entire sky, at least when you’re not distracted by the millions of other brilliant stars all around!

There’s only a couple of things that can foil this nighttime treat.  Weather – clouds, rain, general “icky” conditions – forget it.  You’re not seeing anything.  The more sneaky villain is the moon if it’s up all night.  Don’t get me wrong – it’s still pretty and you can see many more stars than you typically can in an urban or suburban area on a clear night.  The moon just drowns out the twinkles a little by its sheer brightness in the sky.  For this trip, the weather generally cooperated.  The moon… not so much.

The timing of our trip to Goblin Valley fell in between the extremes of the moon phases – smack on a quarter moon that was coming up around 9 or 10pm each night with clear skies and setting mid-morning.  It muted the skies a tad, but we still marveled at the universe blanketing us each night and I wanted to capture it in a picture somehow.  Just how?

I played with star trail shots a little almost 10 years ago during our trip to Chaco Canyon NP in New Mexico (very, very much in the middle of nowhere!).  I was pleased with the shots I got, though we quickly realized the true challenge of the photography process was staying awake late at night waiting for the long exposures to finish after a long day of hiking in the heat.  Staying awake at Goblin Valley wasn’t going to be as much of a problem, but with the moonrise timing, straight-up star trail shots weren’t going to work.  Just too much light.

That’s when it hit me – why not use the moonlight as my light source and see what the landscape looks like on a long-ish exposure?  The next morning I happened to wake up well before daybreak, so I decided to give it a go right outside of our campsite using a huge bluff of rock right behind us as the focal point.

It took a few shots to dial in how long the exposure should be, but I quickly figured it out.  That’s when I bagged a shot that looked awesome and different on the camera’s display that I almost did cartwheels right then and there!  (Naturally, when I got home & saw the pictures on the big screen, I saw how much camera shake was in the image because of the wind, but I salvaged it – thank you post-processing tools!)

Swooping Stars at Sunrise

Knowing the sun was closer to rising than I liked, time was short and I got back into it and clicked off a few more shots.  When you’re doing a series of pictures in low light like this in close succession, you really see how quickly lighting conditions change.  The sun rises surprisingly fast and the lighting changes nearly imperceptible to your eye have a huge effect on exposure times.

From the Valley to the Stars

While the shots looked fantastic on my camera in the field (despite the aforementioned shake issue), what I didn’t realize until I got home was I managed to create shots with mini-star trails in them!  Even better was that the horizontal shot above happened to be facing the north, so I got the North Star in the shot meaning the trails – given enough exposure time – create circles.  Woo hoo!

Eventually it got a touch too bright to continue with the long exposure moonlight shots.  But before I put the camera & tripod away, I swung myself around to face east and caught the early morning color on the horizon as day was breaking, complete with Molly’s Castle in silhouette.

Dawning

Jazzed about the outcomes of this little experiment, I convinced my husband to get up with me even earlier on our last morning in camp so I could try some of these shots among the goblins.  Being the wonderful husband that he is, he agreed and off we went.  That’s when the moon teamed up with the weather to foil our adventure.

Patchy, thin clouds rolled in over night.  Some stars were still visible and the moonlight was filtered through the thin clouds or peeked out when there was a hole in the shroud above.  Oh, and the wind was back too (though not as bad as the day before, thankfully).  Still, we were up, so may as well give it a go and see what happens.

I wasn’t quite as excited about these shots in the field as I was the day before, but the shots I came home with looked otherworldly!  The winds turned patchy cloud cover into streaks of silky white across the sky and the goblin-filled landscape looked like something you might find on a well-eroded area of the Martian landscape in the middle of the day.  Funky to say the least!

Otherworldly

Early Morning Moonlight

Although attempt #2 at using moonlight as daylight wasn’t as successful as my initial outing, I learned a lot about shooting in conditions like this and I already have ideas for new things to try next time I have the opportunity.  The question is – when will that opportunity arrive?  Maybe at Great Sand Dunes in 2018?  Hmmm…

– JC

Happy Surprises in Goblin Valley

For our trip to Utah, we used Goblin Valley State Park as our base camp for our adventures.  For “just” a state park, it’s pretty cool.  In fact, we loved this park and its surroundings so much we wished we had more time to spend in the state park itself!

This park is truly in the middle of nowhere (just how we like our campgrounds & hiking!) – about 2 hours from Moab.  The scenery in the park and all around was simply spectacular.  The landscape was certainly what we expect to see when we’re in eastern Utah, but in some ways it was even more interesting since it’s near the San Rafael Swell.  Tons of colors in the land and curves and shapes and shadows all around.  Really a delight.

A Swell Swell View

After our adventures in Little Wild Horse Canyon that same morning, we dried out enough to go exploring in the afternoon and see what this goblins thing was all about.  What better place to check things out than the aptly named Observation Point?

We pulled into the trailhead and, oh wow… there be goblins!

The Goblins

The little rock formations were all over the canyon floor as far as you could see in so many directions.  They were so funky and mesmerizing.  They reminded me a lot of the drip sand castles we would make as kids at the beach with really watery mud.  Hikers are allowed to wander through the goblins to their hearts’ content, so I was disappointed we didn’t have more days in our schedule to play around down there with the camera.  Maybe next time…

Our plan for the afternoon was an easy hike out to Goblin’s Lair.  Even though we were leaving the lil’ goblins behind, there was still plenty to see along the way.  Simply stunning country all around and a gorgeous day t’boot…

A Tower of Goblins

The terrain along the hike was pretty gentle.  A little steep getting into the valley, then it flattened out for most of the way making for an easy walk to Goblin’s Lair.  Good thing too because with my boots still soaked from the pools in Little Wild Horse Canyon, I was hiking in my barely-any-tread-left Teva sandals and socks!  (Super stylish, I know.)

The terrain changed swiftly when we reached the lair.  We had to climb some really steep rocks & boulders.  Tricky enough when you’re wearing boots with good tread while carrying a big camera, even more so when you’re in your reserve campsite-only sandals.

I did trek up to the mouth of the lair – slowly – and I made it with both myself and the camera in one piece.  We took a peek inside the Lair itself and found that you could climb down into this big, dark cavern that only had a small shaft of light coming in from a hole in the rock above.  It looked awesome, but I didn’t want to chance it with my iffy footing and equipment.  My husband though?  He climbed down in there.

He said it was awesome & a little spooky.  It was easy to see why the lore of this site revolves around it being the origin of the goblins in the valley.  Not too much see in the way of pictures though since it was so dark in the cave, but he said it was really cool to experience.  (Dammit!  Next time I’ll keep my boots dry!)

So what did I do while I was waiting for my husband to finish exploring in the dark other than worry about him getting in and out of there safely?  Take pictures, of course!  With the time of day and the angle of the sun, the lighting was fairly extreme and tough to balance, but I did like one shot I came away with there from just outside of the Lair.  It seemed fitting for the entrance to a “lair”…

Into the Lair

Heading out to Goblin’s Lair was a nice end to a fantastic day in the valley.  Even though I missed the main attraction on this particular hike, we still got treated to some more stupendous views on the way back to the trailhead.

Out to Molly's Castle

Based on this first full day in the park alone, it’s safe to say Goblin Valley is somewhere we’ll wind up again in the future.  Lots of good stuff yet to be explored & photographed, and our stay here is only halfway over!  Horseshoe Canyon is yet to come…

– JC

Into Little Wild Horse Canyon

I love slot canyons.  Their depth, their towering wall heights, how skinny things get, the way the light plays around and bounces off the walls.  There’s a ton to love as a photographer.  Unfortunately, those exact same characteristics make them really tricky to photograph to truly capture their beauty.

Little Wild Horse Canyon in Goblin Valley State Park in Utah fit that pattern precisely.  Maybe not quite at the start of our trek, but certainly as we got closer to the end.  It was a fabulous progression.

Our morning hike started off simply enough.  Meandering down a dry creek bed, with obvious signs of where the water runs when it does arrive since there were some big cottonwoods changing into their fall colors to greet us.  (I also got some magical morning sunlight on the bark of one of the trees.)

It rained in the area about 2 weeks prior to our arrival, but Utah being Utah, we didn’t think much of it since we were heading to the desert.  It’d certainly be dry by now, maybe an occasional tiny puddle to splash through.  As we got to the mouth of the canyon, we saw that wasn’t the case.  Thankfully my husband – hiking research guy that he is – had read there was another way around this “puddle” so we stayed dry (for now).

Entry Dip

Once we trekked our way around that “welcoming pool”, things started to look more like normal canyon hiking.  Interesting rock walls, plants growing in unusual spots, rock falls, etc.  A bit of a tricky start, but really pretty once we climbed around it all.

Not long after this point, things started getting narrow.  And sandy.  The canyon floor quickly and steadily became beach-like sand, making walking just a touch harder than normal.  Certainly not difficult enough to stop us though.

Twisting Narrows

As the canyon continued to narrow, we started running into a few more puddles.  Some were easy enough to splash through as they barely got over the toes of our boots.  Others got over our ankles, and a couple got up to our knees.  We kept chugging along because the scenery was so very worth it, and really – what’s a little more dampness when you’re already wet!?

I continued shooting whatever I could.  The light began dancing on the canyon walls as the sun got higher in the sky, creating fascinating highlights & shadow patterns.  There was just so much I wanted to capture, but I tempered that urge a little so I wasn’t slowing us down too much or putting myself in the way of other hikers.  Considering the shooting pace was a little more rushed than I would’ve liked, I came home with a lot of goodies!  (And yes, though the red walls were gorgeous in their natural color, I found during post processing that the black & whites let me play around more with the shadows & textures in the rocks.)

It was a pretty easy walk through the canyon, so long as we could twist ourselves and our packs through the narrowest parts.  We even ran into some stuff to climb over and through to keep it interesting.

Just as things were starting to get interesting though…

Illusion

…we ran into the puddle that shall not let us pass.  (I’ve been reading Michael Palin’s published diaries from the early days of Monty Python, thus the loosely quoted Holy Grail reference.)

We started through a series of puddles that were ankle-deep, then shin deep, then knee-deep, then mid-thigh deep, then… um, really deep.  By measure of my husband’s hiking stick, the next puddle was going to come up to at least above our waists, if not chest-high.  Considering we were surprised to see any lingering remnants of moisture at all on this hike, we weren’t prepared to get quite that wet.  Naturally, for me, I had the added bonus of visions of slipping & plunging to neck-deep with my camera attached to me flash before my eyes.  (When you have a clumsy gene, these visions flash in your mind all the time!)

When we made the call to turn around and head back, we estimated we were probably 2/3 of the way into the canyon.  We certainly saw a lot of gorgeous sights.  If only a fellow returning hiker hadn’t passed us and said that the most beautiful part of the canyon lied ahead of that massively deep puddle, we wouldn’t have known what we were missing!  Disappointing, yes.  But that’s ok – it just gives us one more reason to go back!

On our way back to the trailhead, I was quickly reminded of the benefits of out-and-back hiking in a canyon like this.  So long as you’re paying attention to how the light is moving on your way in, you can save yourself some time and skip the shot the first time you see it if it’s in a ton of shadows and plan to catch the sight in better light on the way out.  (My husband very much appreciates that I try to do that – one less thing slowing him down at the start of a hiking day!)

Even though our bottom halves were utterly soaked through, we still saw some grand sights on the way out.

An unexpectedly wet day in Little Wild Horse Canyon for us, but we really enjoyed it and can’t wait to go back to explore it some more!


– JC

The Building Pictures Project

(Originally posted May 6, 2013)

(Yes, it’s been forever and a day since I was last able to post – more on that at the end of this entry.  Consider yourself teased!)

The next project on the A to Z list was for Building Pictures.  This technique is as simple or as difficult as you want to make it.  It’s all about taking a picture (or two) and using bits and pieces to get the result you saw in your mind, but maybe couldn’t quite achieve straight out of the camera because you couldn’t get the angle you wanted, people were in the way, you didn’t have access to a viewpoint… You know, those “little” things that can sometimes get in the way of snagging the perfect shot.

I think the hardest part about this project for me was simply finding a picture to build off of.  A lot of my shots are of nature or everyday mundane things, and nothing was really jumping out at me as the “cornerstone” for this project.  That was until I walked into my home office and looked at my black & white print of the rocks of Park Avenue at Arches National Park in Utah.  I adore that picture as it is, but then I thought to myself, “Why not double the goodness?”  Working with the original color version of the shot would also mix things up a little.

So here’s what the “cornerstone” building block image looked like:

Arches National Park - Park Avenue (Original Shot)

(Not bad, if I do say so myself!)

Building a picture can be as simple as duplicating the image, flipping it around, lining things up and voila!  You end up with a result like this one, where (to me) I feel like I’m being drawn into the picture as my eyes and mind try to play tricks on me:

Arches National Park - Park Avenue (Built Image)

As one friend put it, it looks like a landscape Rorschach!  (And I have to say I agree with him!)

Building a picture – if you have a good foundation shot to start with – doesn’t take long at all to change things up and create some new art!


– JC


PS – So the reasons/excuses for the delay in blog posts is simple – we’re moving!  Our house sold lightening-fast (thankfully!) and it’s been a whirlwind for the last few weeks.  We’re settling into packing mode now for the move in July, so I’ll try to post every now and then in spite of what’s bound to be a hectic summer!  Once we’ve landed, unpacked, and I get setup, you can bet I’ll be playing catch-up… and sharing new images of our new surroundings (which promise to be a big change from where we’ve called home the last 10+ years!).

Crouching Tiger, Hidden Husband

(Originally posted January 6, 2013)

Double Arch - Arches National Park - Utah
Double Arch – Arches National Park – Utah

Whenever we’re traveling, my husband usually gets treated to my asking him for little photographic favors like, “Sweetie… could you do me a favor and crouch down behind that rock for a sec?” or “Sweetie… could you do me a favor and tuck yourself around that corner for a second?”  Usually I get a small eye roll, a quick sigh, and then he moves out of the way so I can get my shot.  (When we get home, he appreciates the results in the picture though!)

This shot of Double Arch in Arches National Park outside of Moab, UT was one of these shots where I needed my husband to do me a solid.  Somewhere, behind one of those rocks, he’s crouching and hiding for me so I could capture this scene sans people.  Lucky for me he’s so obliging.  Even better that I got the shot when I did because not long afterwards, a swarm of people came up the trail and there would be no more getting this shot without people in it!

So this quick post is really a tribute to my husband who puts up with some simple (and not so simple) requests for me when it comes to my photography.  Without his help – big or small – shots like this wouldn’t be possible.


-JC

Sunset Ninja

(Originally posted September 18, 2012)

Bryce Canyon Sunset Walls

How my husband puts up with some of my silliness while I take pictures, I’ll never know… but I’m so grateful that he does!!

One of the more recent moments where I think he was slightly embarrassed to be seen with me while I was taking pictures was when I was capturing the phenomenal site that is Bryce Amphitheater at sunset.  He probably felt that way because I was dressed like some sort of photographic ninja.  Let me explain…

We were camping during our entire stay at Bryce Canyon National Park and as the sun was getting lower in the sky, we made sure that we were ready for bedtime before trekking to Sunset Point for my photo session with the Amphitheater.  We had an early dinner, washed up as best as we could, and hopped into our woolies for the cold night to come.

It’s those pajamas that gave me my ninja look – black thermal pants, a long sleeve black t-shirt, my fleece jacket liner – black, and my navy blue baseball cap.  Even all of my camera equipment was black!

As we rolled to Sunset Point and walked to the canyon rim, I got quite a few looks from the tourists walking back to their buses.  Even my husband sat a small distance from me chuckling at the spectacle I had become.  (Though he was laughing, he was still acting as my one-man security team, always watchful of my safety because of the attention my camera setup often unintentionally brings.)

The look I cared about was what was in front of the lens – not what I was wearing behind the camera.  I’d have to say that for my first Bryce sunset, the results speak for themselves!  Not bad for a “camera ninja”…


-JC

Hiking in Water

(Originally posted August 15, 2012)

Zion Narrows Reflected Sunlight

I started creating galleries from our most recent trip to the Southwestern US… a trip that included stops at Bryce Canyon & Zion National Parks!  This shot is from the hike we did in The Narrows in Zion.  Hiking The Narrows is something my husband has always wanted to do.  Thankfully, the weather and the water levels cooperated and we were able to do it!

Hiking The Narrows can be easy or hard or somewhere in between because you hike in a river the entire way.  The only times you’re not up to your knees (or deeper!) in water is when you pop out onto little rocky sandbars along the edge of the canyon.  In many places, there’s nothing but the Virgin River flowing around you and sheer rock walls 1,000 feet high.  Pretty spectacular stuff to see, and pretty difficult to hike and photograph!

The day was pretty nerve wracking for me for 2 reasons:  1) Do I trust the dry bag with my camera in it? and 2) How will my nagging foot injury react as I’m hiking in a river?  I’d say we were more successful with the camera than we were with my foot.  (It’s at that point where my husband enjoys telling stories of my occasional complaining when we started to head back to the trail head and the foot pain was, shall we say, unacceptable.  I’ll leave that colorful story to him to tell in an offline format over adult beverages.)

So, back to the hike and the picture… This hike offered some really amazing views that were really challenging to get on camera.  And as much as I wanted to take a picture of everything, I resisted because we wanted to cover as much ground as we possibly could and the unpack-shoot-repack process took a long time because of all of the waterproof precautions in place.  Thankfully, I came home with some pretty amazing shots of this really unique place within Zion that we can’t wait to go back to!

-JC